How To Setup WordPress Single Sign On (SSO)
The GoToMyAccounts Single Sign On plugin for WordPress allows you to have direct links into your customer portal for any logged in WordPress user. Your WordPress user's email must match the corresponding user's email address in the GoToMyAccounts web portal.
- To enable the plugin, login to your GoToMyAccounts web portal (requires admin permissions). On the left side menu, click Integrations, and then click "SSO Tokens".
-
On the SSO Tokens page, you can create new tokens and remove existing tokens. You cannot edit or view existing tokens. This is a security feature. Because of this, you must copy the token and save it in a safe place. Or, just paste it into the WordPress plugin settings page. If you need to generate a new token later, its as easy as coming back to the SSO Tokens page.
- Once you have the SSO token, you will want to login to your WordPress admin site.
- Note: As of December 2020, the GoToMyAccounts SSO plugin is no longer published in the WordPress plugin repository. If you are interested in why that occurred, you can read about it here.
- You can still use our WordPress SSO plugin, but you will need to download it from our own open source repository and then manually upload it to your WordPress site. Follow the instructions below.
- Download the plugin from our code repository.
- In the code repository, you only need to download the file "gotomyaccounts-sso.zip" That is the file you will upload in the next steps.
- Go to the Plugins page and then click "add New".
- Click "Upload Plugin".
- Upload the plugin zip file, and then click "install"
-
That's it for installation. We will make announcements whenever the plugin is updated so that you can update as needed.
- After adding the plugin, be sure to "activate" the plugin.
- You will now have a new item in your settings menu called "GoToMyAccounts SSO". Click that menu item.
- On the settings page, you need to first populate two items. Set your web portal address (without http:// or https://) (Also do not place any trailing "/"). Example: myportal.gotomyaccounts.com.
- Next, paste in the SSO token you created in an earlier step.
- Save these settings
- Now let's create the first SSO link. Go to Pages and create a new page.
- Name your page whatever you like, but for this example let's call it "Customer Dashboard".
- Save the page. You do not need to enter any content. This page is simply a placeholder for the redirect.
- Now go back to the GoToMyAccounts SSO settings page and we will add the redirect.
- The dropdown list of pages should now contain the page you just created.
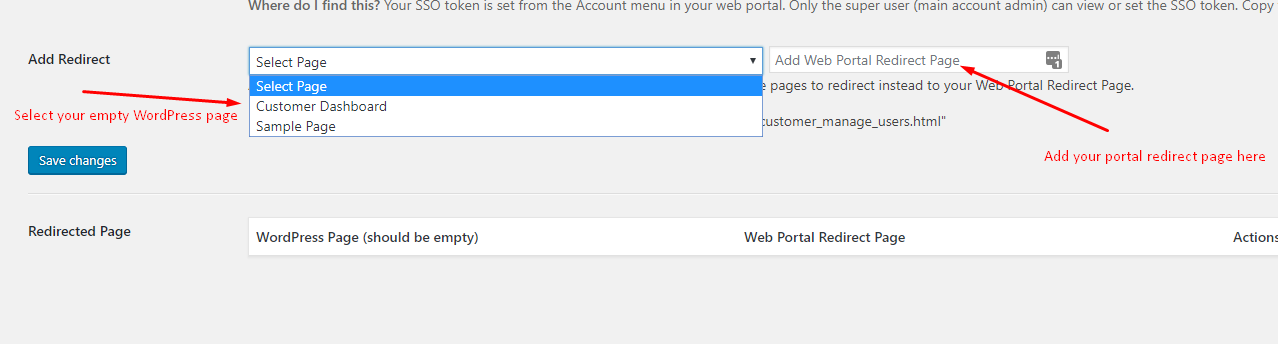
- Select the page, and then enter the web portal page that it will redirect to. In this example, we will enter "customer_dashboard.html". But you can enter any valid portal page that your user can access.
- Click "save"
- Now that we have the redirect created, let's add that page to a menu and try it.
- In your WordPress admin site, Select "Appearance", and then "Menus".
- Choose an active menu to work with (or create a new one if you don't have any).
- Select the "Customer Dashboard" page we just created and then click "Add to Menu".

- Adjust the menu ordering as needed, and then save the menu.
-
You are now ready to test the menu item and the redirect.
Make sure you are logged in with a WordPress account that has an email matching a customer in your web portal. Again... the emails need to be the same, or the SSO authentication will be rejected.
- When clicking on the Customer Dashboard menu item, the SSO plugin should work its magic and redirect you directly to the customer dashboard page.
Tip: In your GoToMyAccounts portal, you should also create custom menu items that allow your users to go back to your WordPress pages. You can set that up in your GoToMyAccounts settings.